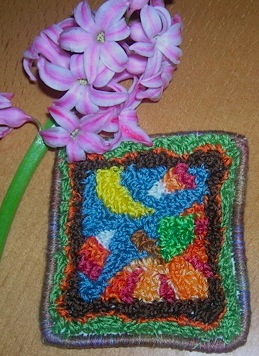
My daughter Irene’s first “punch”
My dearest friends,
Why don’t we have a good chat on punchneedle? That’s undoubtedly a craft that has been going under the spotlight lately, thanks most of all to its easiness and speed. Honestly, I must say I wasn’t enthusiastic about it at the beginning… Or, better said, I wasn’t so curious about it: at least not so much to be pushed to try it. Then, somehow for fancy, somehow for necessity (i.e. the questions of the friends of CasaCenina on it were getting more and more numerous every day!), I decided to try it. So, with my daughter Irene, we bought a ‘basic’ kit (from Lizzie Kate), the needles and a small wooden frame (the typical hoop frame) and we put on the wonderful DVD by Charlotte Dudney, to better learn this technique and discover its secrets. Though the DVD is fully in English and without any subtitle, its images and explanations are absolutely clear: so clear that even Irene (who’s only 12 years old) had no problem at all in understanding how the whole thing works.
And, yes… I must admit I had to change my mind. I really enjoyed creating this small work of art and, most of all, my daughter’s enthusiasm turned out to be infectious: she has become keen on this craft! Maybe that’s because she usually gets quickly bored of everything and she always needs to change everything… (Just like her mother, whose box of “unfinished objects” is getting more and more overflowing, sigh… But that’s another matter)… Or maybe, because the “end-product” is absolutely lovely and rewarding… Well, in any case, Irene got me buying four more charts and has immediately set to work ☺
So now, with the enthusiastic support of Irene and the highly valuable guide of Charlotte (it’s a DVD I’m going to refer to a lot, both for its images and with some translations), let’s try to get a little more in depth into this magic world.
- A short history -
The punchneedle has become fashionable in the last years, but it has a surprisingly ancient story.
In fact, its origins date back to the 17th century, when it was born in a small community of Russian immigrants, who had moved to the USA. Under the reign of Peter the Great (17th century), the Russian Orthodox Church experienced a period rich in changes, which were not accepted by everyone.
The opponents suffered a hard repression and were confined to the outskirts of Russia and some of them were forced to emigrate to other Countries. Among their favorite destination there were the United States, where they formed some small, quite closed communities.
And it’s just in these small communities that the punchneedle – at first used only to create embellishments and ornaments for clothes – started to be handed down, till coming to us.
- Grounding -
What do you need and how does the work look like? First of all, we’re not talking of counted cross stitch, but of something much more similar to traditional embroidery (such as, for example, stem stitch, straight stitch and similar ones). The subject is printed directly on a fabric: usually on close-woven, compact cotton. You have to work from the backside and this is probably the peculiarity of punchneedle: the finished work can be seen only if turned round and is looks like a sort of small carpet, with a pleasant “relief” effect. So, here’s what you need: printed canvas, a frame (it’s fundamental to keep the canvas well stretched), the threads (I’ll give you the details on them later on) and the particular punch needles.
- The punch needles -
The needles are the “strangest” tools needed for this craft. You can find a number of different needles, but they basically share a central body, which the thread will pass through, a metal point with an eye (which the thread will come out from) and a system of spacers, conceived to define the “depth” of the stitch we’re going to create.
A “threader” is often supplied with the needles and it’s a fundamental tool as well, in order to get the needle ready for crafting. If the threader isn’t supplied with the needle, it should be purchased separately.
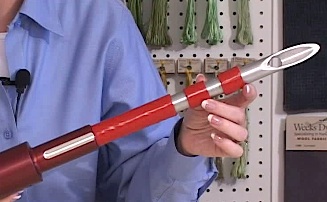
A typical needle, here enlarged to show its details
Acting on the craft’s depth, we can create designs with parts having differents thickness, such as, for example, a deeper flower will be more in relief than a background with lower thickness.
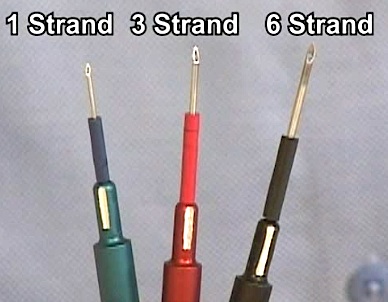
There are three different sizes of needles, according to their dimensions. They can be used as following:
the thinnest with 1 or 2 plies of mouliné (even hand-dyed ones), or with the perlé number 12;the medium-sized with 3 or 4 plies of mouliné, or with the perlé number 8 (or similar threads); the largest with 5 or 6 plies of mouliné, or with the perlé number 5 (or similar threads)- The fabric and the frame -
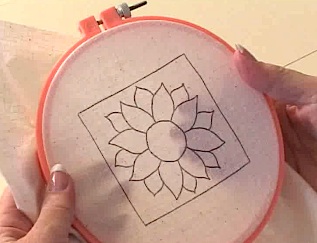
as already said, the fabric is printed: so, many kits you can buy already include the printed canvas.
A good alternative can be the transfer printing, enabling to transfer any design we like on the fabric we’d like to embroider (that’s something similar to cutwork embroidery, for example).
The use of a frame is
essential, there’s no way to work without it: honestly, the classic embroidery hoops are the best solution, both those of plastic and of wood. Pay highest attention in selecting the size of your frame: your punchneedle must be fully included within the diameter of the frame you choose.
- The threads-
How can you choose your threads? Well, just take your pick! You just have to let your imagination run free! You can use the common mouliné, but also have fun with multicolor threads (such as the so-called “Color Variations” from DMC, which are perfect for backgrounds, flower petals and so on), as well with hand-dyed threads. But you can also “dare” use the so-called metallic threads and the particular threads, such as the Wisper from Rainbow Gallery (try them, for instance, when you have to embroider some snow).
In any case, it’s always important to match the right thread thickness (or the right number of plies) with the right needle, as said before.
Right, that’s all for now… But I’ve said for now: because in the next post, we’ll see in details how to prepare the needle and the fabric, as well as how to craft your punchneedle at best!
In the meantime, let me now your opinions about this craft and your experince: I’d like to know how you “cope” with it, what intrigues you, but also if there’s something about it you’d like to know. I’m waiting for your replies!!!
Cristina
NB: all the pictures included in this article (apart from the first one) are taken from the DVD
Punchneedle Embroidery DVD di Designs From The Pep'r Pot.
Next post -
Punchneedle: let's do it!
curioso (MoAm3161) Date Added: 03/29/2008
ciao Crys,
anche a me non interessa molto questa tecnica, ma devo dire che sentendone parlare con tale entusiasmo (i bambini sono fantastici), mi incuriosice un pò.
Non parliamo per carità dei lavoretti non finiti. Mio marito mi ha detto che il px acquisto me lo sequestra se prima non finisco gli altri.....povera me. Pensare che sto aspettando il pacco di Casa Cenina in arrivo lunedì px!
Comunque aspetto di vedere qualche altra lezione di questa tecnica dal nome impronunciabile (ha una traduzione?), e poi chissà. Intanto BUON LAVORO!
Un salutone a tutti.
Monica
interessante (pafa13362) Date Added: 05/12/2008
spero che continuerete presto con la descrizione anche perche' sono molto interessata e voglio provare e voglio sapere quale e' il minimo di attrezzatura necessario (non voglio spendere un capitale) e anche io ho un marito che mi guarda con riprovazione
interessante (pafa13362) Date Added: 05/12/2008
continuate! voglio saperne di piu', anche per poter comperare il minimo indispensabile di attrezzatura per provare (anche io ho un marito che mi guarda male se acquisto cose che poi non realizzo mai)
patrizia
molto interessante (veev3850) Date Added: 05/13/2008
spero di vedere presto la prossima lezione mi incuriosisce molto questa tecnica!!!! veronica
Very Useful!! (SaEs15058) Date Added: 05/21/2008
Hello!! I like punch needle a lot. In my opinion is very easy, fast and most of all, relaxing.Your explanations are very useful. Congratulations!!
If you like to see some of my works in punch needle or if you need any help, you can visit my blog at http//bachiame.blogspot.com
Sandra
Reply (vede32220) Date Added: 03/31/2010
buongiorno, ho comprato di recente un punch needle embroidery della clover, il problema è che, quando infilo il filo nel tessuto non rimane il punto, si sfilano uno ad uno i punti, anzi addirittura faccio il primo punto poi il filo esce dal tessuto, voi sapete per caso spiegarmi il motivo, inoltre mi dareste indicazione di quale filato utilizzare e se avete dei pattern semplici.
Grazie mille.
Vera.
come fermare i fili nel retro a lavoro finito? () Date Added: 01/09/2015
Salve, mi sono avvicinata da poco a questa tecnica e me ne sono follemente innamorata!!!
Volevo delucidazioni riguardo i tessuti, quali si prestano meglio? Mi spiego meglio, vorrei fare delle federe per cuscini da decorazione, si presta bene la classica federa di cotone o rischio di bucarla troppo?
Infine, a lavoro finito, come posso fare per assicurare bene i fili sul retro, in modo da non rischiare sfilacciamenti durante i possibili lavaggi?? Esistono colle, telette specifiche?
Grazie
Sara

 English
 Français
 Español
 Italiano