- Preparing your work -
Right! Now it's time to get down to work! First of all, let's get our fabric ready, fixing it firmly into the frame. As already said, the design must be fully included into our frame or hoop, so it's better to carefully choose the size of the frame or the hoop to be used. The fabric must be quite taut on all its sides, so that when tapping on it, we'll get a sort of "drum" effect: i.e. we'll hear the typical sound of a drum and we'll be sure of the fabric tautness. However, pay attention, while stretching the fabric, not to distort the design. To do so, just stretch each side, so that, once you've finished, the design looks well aligned. Now, let's get our needle ready: always follow the directions you can read on the pack of your chart. The most common needle is the middle-size one, to be used with three plies.
- How to thread your needle -
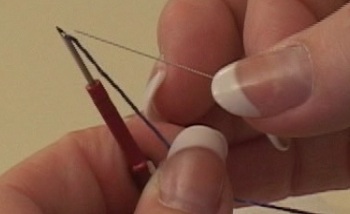
The tool needed for threading your needle is called, in fact, "threader"
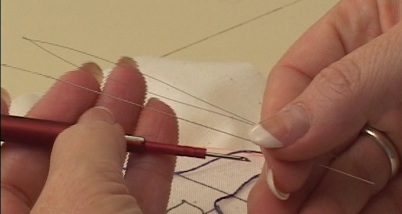
the needle and the threader
Insert the threader into the needle, from its point, to let it then come out from the other side
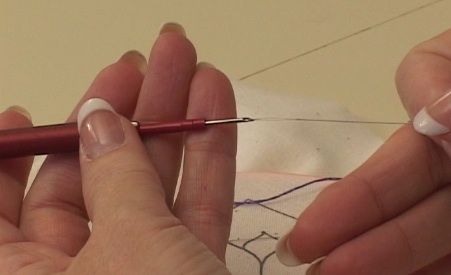

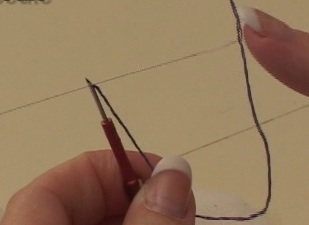
Now, you're ready to pass the thread through the eye of the threader
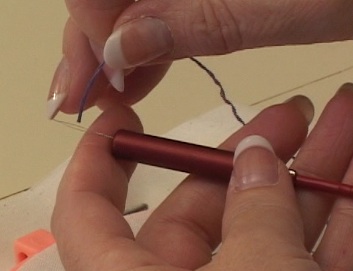
pull the threader gently from the needle side, until the thread comes out
let approx. 10 cm of thread come out, then,
without unthreading the thread take the point of the threader and let it pass through the small hole you find on the point of the needle, so that the thread, too, passes through it
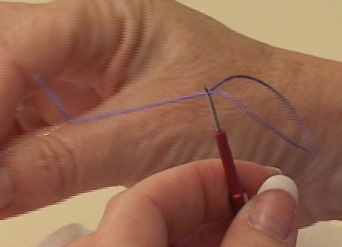
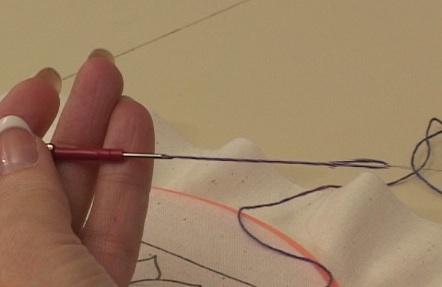
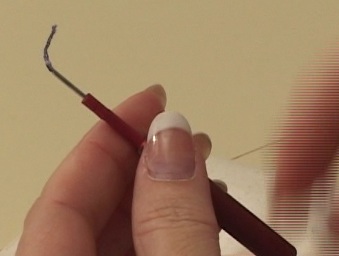
Now, you can take the thread off the threader: pull the thread gently from the back of the needle, so to leave a couple of cm on the needle side. Now, the needle is ready to be used.
- Let's get it started -
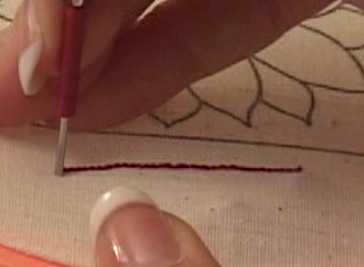
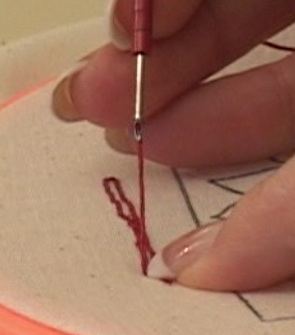
In order to familiarize yourself with this technique, try it out sometimes on the fabric sides. Place the thread on the needle back and then the needle on the fabric
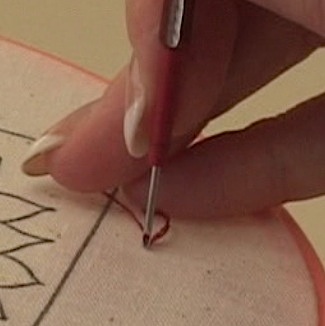
press the needle to the end, always keeping it
perpendicular to the fabric
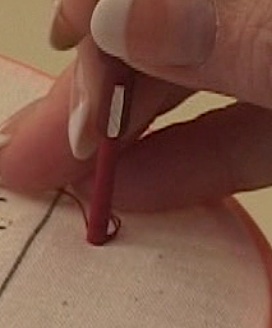
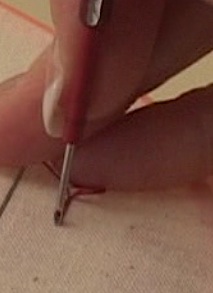
Now draw the needle again, without pulling too much and always leaving the point close to the fabric, move slowly forward and repeat the operation.
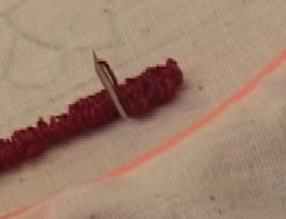
The width of the stitch depends on the number of plies, as well as on the needle, you're using, though it's usually quite small. If your stitch is too long on the right side of the work, you'll see a larger space between one stitch and the other, so you should try to keep a highly steady stitch width.
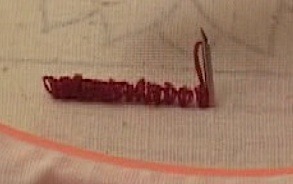
the stitches highlighted are those stitched correctly
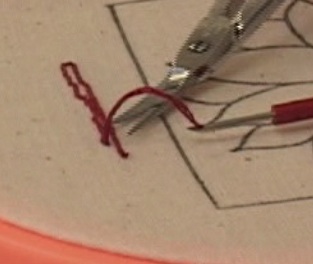
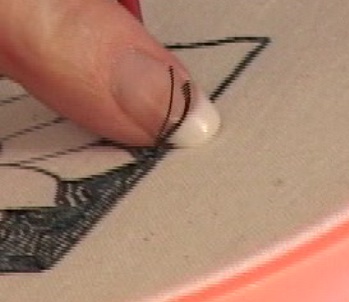
Go on with the design and when you have to turn,
do not turn the needle but turn the frame, or the loop, if you're using a loop, so that the needle is always facing you.
It is very important not to stitch lines too close with each other: the ideal distance is the one equivalent to size of the needle you're using. If you stitch lines too close, you might end up with loops interwoven on the right side of the work: and that's no good.
- How to finish your work -
Once you've finished stitching an area of a certain color and you have to change color, you've got two alternatives to close your work.
On the side you're working on, keep the thread firm with a finger and pull the needle, then lay it down and cut as close as possible to the fabric.
On the side opposite to that you're working on (that will be the right side of the finished work), simply cut the thread, when the needle is inserted, at the same height of the loops already finished.
 Do not tie knots!
 Neither when starting the work, nor when finishing it: the thread stays fixed to the fabric and this is why this technique requires a very tight-woven fabric.
If it's your first time with the punchneedle, just take your time and try it out, before beginning a proper work. If you do something wrong, all you have to do is pulling the thread, and the work will be easily undone.
It is better not to re-use the thread that has been removed after a mistake, since it will result paricularly twisted and, therefore, particularly difficult to be used again for stitching properly.
- Carrying out the design -
The first important thing to say is that
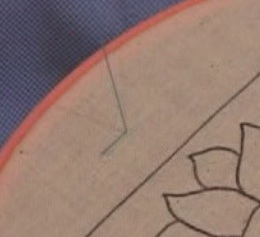
you don't have to stitch on the lines of the design (except for the lines representing a sort of frame, when present), but exclusively inside them.
Stitch a row of stitches inside a line and another one outside it: the resulting distance will be the right distance to be kept throughout the work.
Punchneedle charts usually expalin the order, the different areas of the work must be stitched with, but, generally speaking, we can say that backgrounds and large areas should be stitched first and then details and profiles.
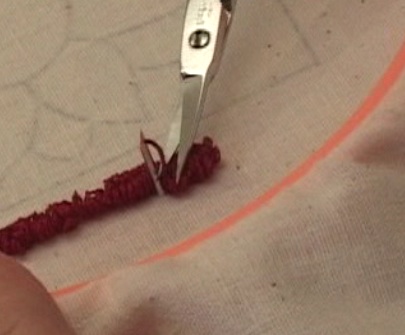
Always remember to cut the exceeding thread from the openings and the closures, mainly to prevent them from being pulled, thus undoing the parts of the work already completed.
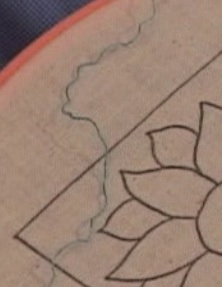
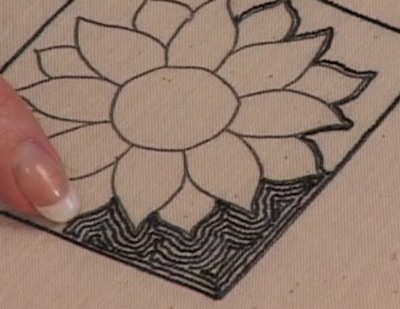
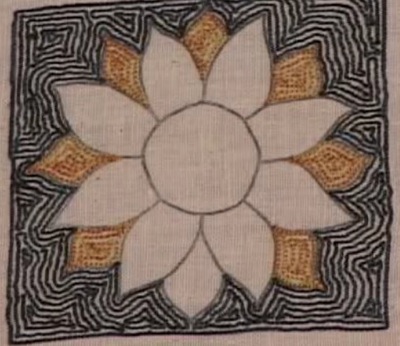
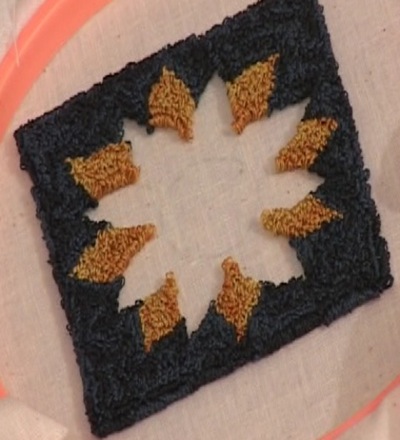
For instance, if your punchneedle is a sunflower on a dark background, you'll stitch the background first and then the first round of petals: the background should be stitched starting from the outer lines of the design, while petals should be stitched starting from the inner contour lines.
Then, we'll start stitching the more and more inner petals, always keeping ourselves within the contour line.
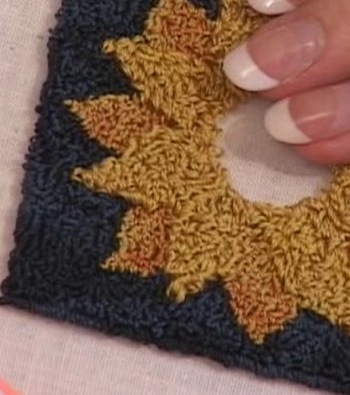
Now, we can stitch the contours of our petals: and this time, we'll work right on the contour lines.
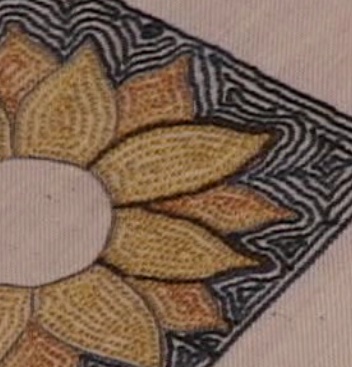
And, last but not least, let's stitch the center of our sunflower.
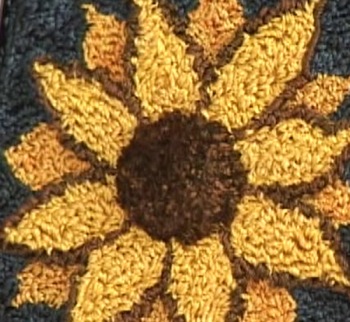
And that's done! Our work is over and we can now refine it and frame it as we like! Happy punching!
PLEASE NOTE: all the pictures included in this article are taken from the DVD
Punchneedle Embroidery DVD from Designs From The Pep'r Pot.
This DVD will also give you some useful advice on how to refine your work, as well as on how to solve some typical problems. You'll also find some lovely charts to print out, as well as the printed fabric with the sunflower we've just used as an example.
Previous post -
Let's talk about Punchneedlechiarimenti (cipu7346) Date Added: 08/20/2008
questo tipo di lavoro mi attira ma vorrei sapere se ho capito bene si lavora al rovescio? è possibile che in commercio ci fosse già qualcosa per fare il punto spugna,un ago un pò più rudimentale,.
Crys: si, hai capito bene, si lavoro al rovescio. Per il momento questi sono gli unici aghi per il punch che abbiamo disponibili. Un abbraccio!
Reply (pulci.net.to) Date Added: 11/26/2008
Ma è bellissimo!Ed io che mi chiedevo...ma che sarà ma che sarà...?
Uhm...magari un girono provo....
voglio provare (robi67) Date Added: 09/18/2009
beh Crys che ti posso dire mi hai convinta voglio provare, però vorrei fare un piccolo appunto a casa cenina perchè ha in vendita solo la confezione da tre punzoni, mentre chi come me deve imparare avrebbe gradito acquistarne solo uno per iniziare.
ciao ti farò sapare come è andata, ci vorrà un pò perchè devo finire un lavoro a punto croce prima.
Aghi punch (Crys) Date Added: 09/18/2009
Ciao Robi, fammi sapere come va, vedrai che è divertente e veloce :) per gli aghi posso dirti che non è banalissimo trovarli, li producono in pochi e quasi sempre nella confezione con 3 misure che sono cmq quelle necessarie per i vari tipi di disegno. Se li troviamo separati cerchiamo di inserirli in catalogo, un abbraccio e buon lavoro :)
domanda per Crys (robi67) Date Added: 11/06/2009
Ciao Crys mi sto cimentando col punchneedle, ho acquistato un kit che conteneva la soffa prestampata lino 28 ct, voglio chiederti se ct maggiori ( 32, 40) possono andare ugualmente bene per il punchneedle. grazie e un caro saluto.
Risposta a Robi (Crys) Date Added: 11/06/2009
Ciao Roby :)
guarda posso dirti che anzi ... più sono fitti e meglio è :) Sia io che mia figlia abbiamo provato tele veramente "toste", fitte e anche piuttosto rigide: i punti tengono meglio (non fai nodi, quindi è la stoffa stessa che "tiene" il lavoro) percui per me sono addirittura consigliate.
Facci sapere come procede, un abbraccio :)
per Crys (robi67) Date Added: 11/08/2009
mi manca pochissimo per terminare il mio primo punchneedle, appena fatto lo inserirò fra i miei lavori, ammetto che non è proprio perfetto ma ho compreso la tecnica devo solo prendere la mano con altro esercizio. E' stato facile seguendo le tue istruzioni quindi lo consiglio a tutte, a proposito grazie a te ho imparato a fare anche i biscornu quindi adesso mi divido tra punchneedle, biscornu e punto croce, vorrei sdoppiarmi!! ciao un caro abbraccio e grazie :)

 English
 Français
 Español
 Italiano